Erc 6384/'CHAF'
General Knowledge and Inspection
The ErC 6384 or 'CHAF' shows up when the Coil Fan 2 is not spinning. When the ErC 6384 shows up, the Bullet will cut the Power to P0 when the IBTS Temp is above 80°C to avoid damaging the Induction PCB Module. The Coil Fan 2 is located on the lower back of the Bullet, partially covered by the Squirrel Cage.
The following list describes the potential causes for this issue:
- The Chaff Collector is not properly installed.
- The Microswitch is broken.
- The Coil Fan 2 is disconnected or broken.
- The Back PCB is broken.
Identifying The Issue
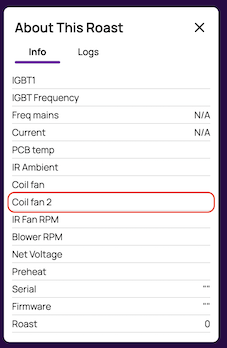
You can check the Coil Fan 2 RPM through the Info Panel on RoasTime:
Connect the Bullet to your RoasTime.
Go to Active Roast and click the 'i' icon on the top left.
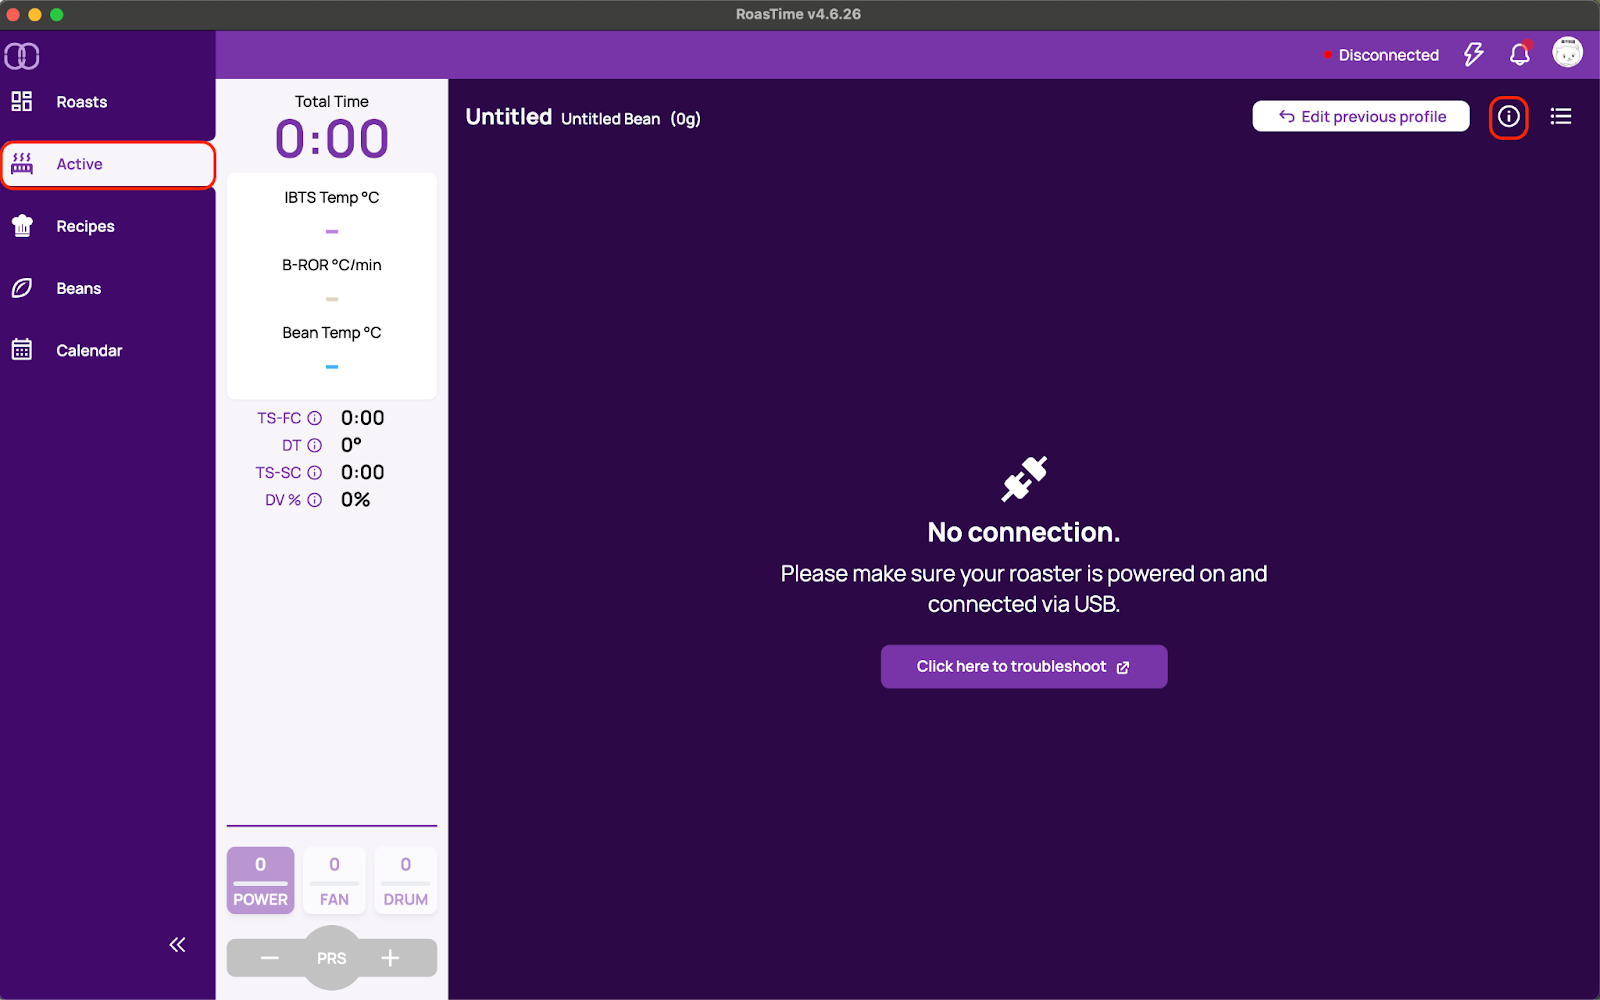
Check the readings labeled 'Coil Fan 2'.
Go to Roasting Mode and set the Power to P0.
TipThe Coil Fan 2 should be running approximately 2,200 RPM and 4,800 RPM when the IBTS Temp is below and above 80°C, respectively.
Checking The Chaff Collector
The Bullet will trigger ErC 6384 if the Chaff Collector is not properly installed. The CE-certified Bullets have a Microswitch on the Squirrel Cage:

The Microswitch is designed to disengage when the Chaff Collector is removed, stopping the Exhaust Fan Motor and Coil Fan 2 for safety purposes. Follow the steps below to check if the Chaff Collector is properly engaging the Microswtich:
- Check if the Exhaust Fan is running.
- Remove the Chaff Collector.
- Ensure that the five stands on the Chaff Collector is properly secured.
- Re-install the Chaff Collector.
Checking The Microswitch
If the issue persists after reseating the Chaff Collector, you'll need to check the Microswitch.
- Remove the Chaff Collector.
- Power up the Bullet and go to Roasting Mode. Set the Power to P9.
- Use a pen or screwdriver to press the Microswitch.
- Check if the Drum Motor, Exhaust Fan Motor, and Coil Fan 2 are running.
If all three motors are running, the Microswitch might have dislodged from its position. Check the Microswitch installation for loose screws.
If only the Exhaust Fan Motor and Drum Motor are running, the Coil Fan 2 is Broken. Replace the Coil Fan 2.
If only the Drum Motor runs, the Microswitch is broken or disconnected. If the Microswitch Cable is properly connected, replace the Microswitch.
If all three motors are not running, the Back PCB is broken. Replace the Back PCB.
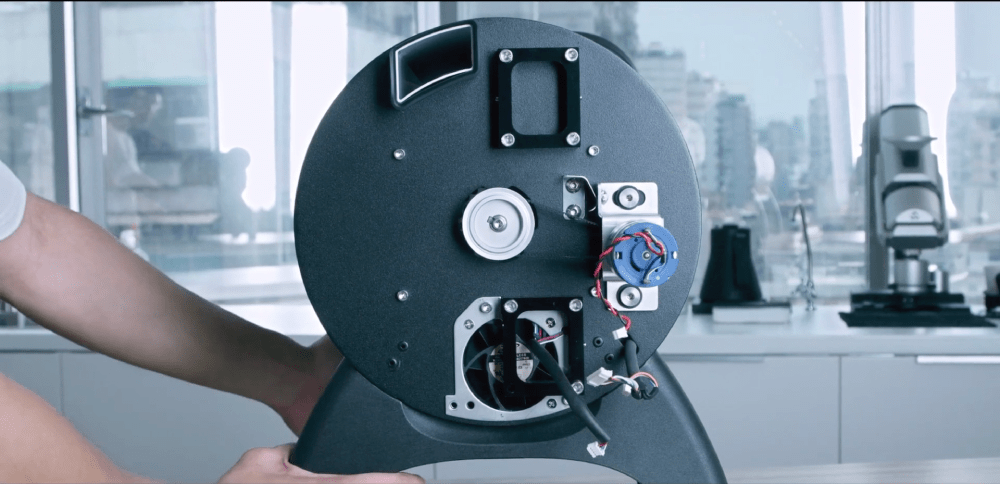
Accessing The Microswitch and Back PCB
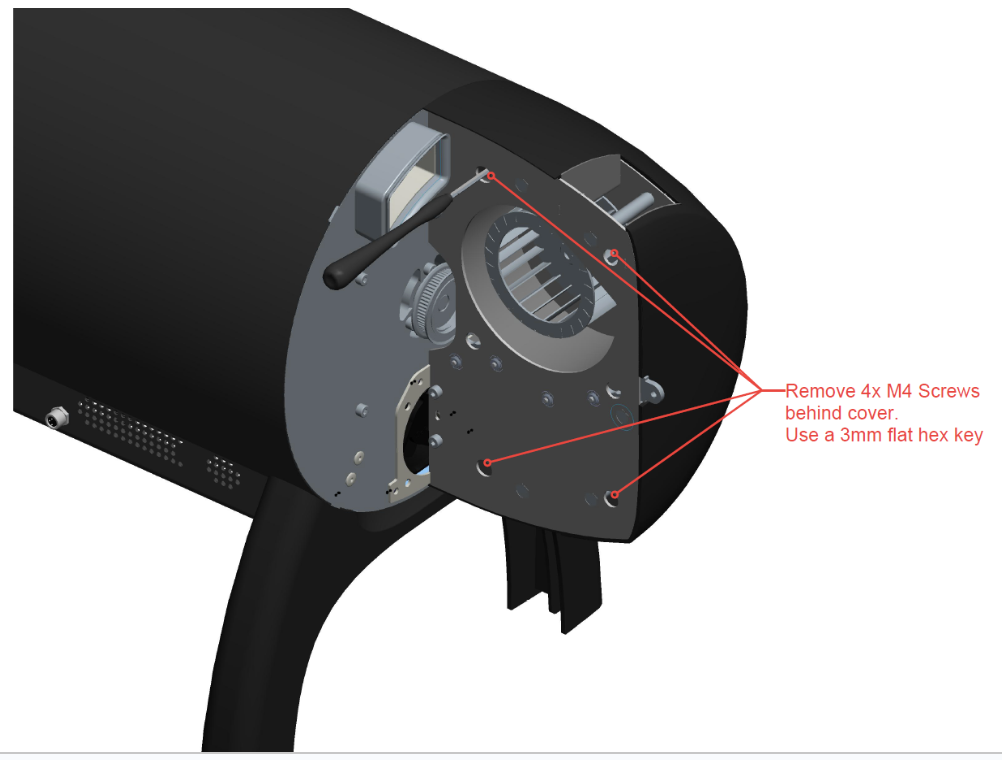
To access the Microswitch and Back PCB, follow the image below to remove the Back Cover:
The following image shows the connection for each cables on the Back PCB:
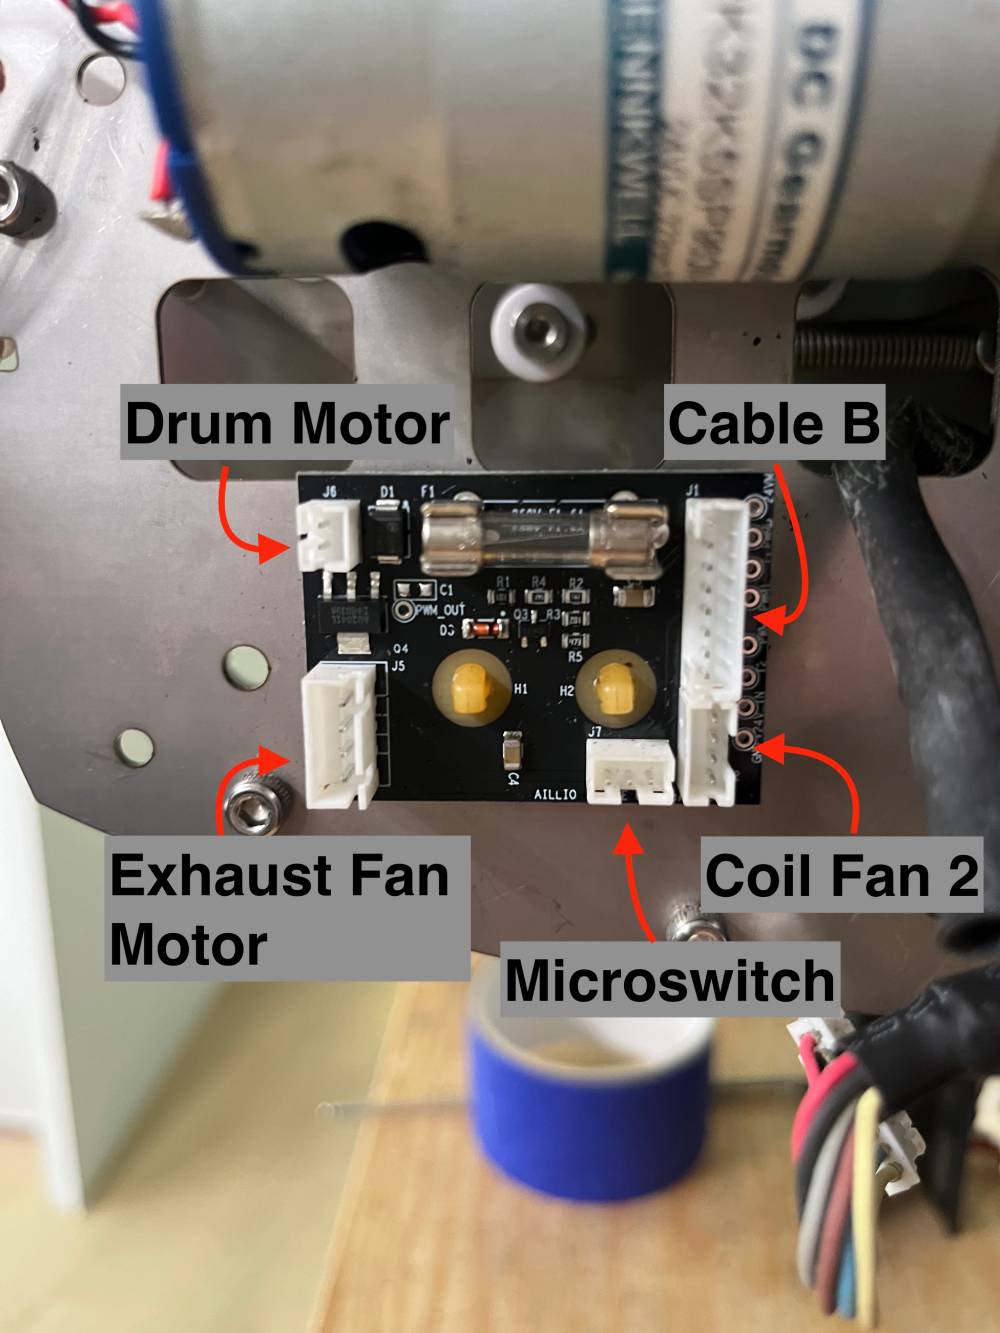
Check if all cables are properly connected or if they are frayed/broken. if the cables are looking fine, replace the parts according to your test results in the previous section (Checking The Microswitch).
Seek Help From Support
If you have done all of the above and the issue persists, contact your reseller or [email protected] for further assistance. The rest of the troubleshooting steps can be considered too complicated for a self-help guide.