Roasts

From the Roasts tab you can:
- Browse and manage your roasting data
- Search for, view, and edit specific Roast Profiles
- Access advanced RoasTime features, such as Playback a Roast
List View
At the top of the Roasts tab you can select from three different list views as shown below:
My Roastsview displays all of your previous roasts, which can be viewed as individual Roast Profiles.Stashed Roastsview displays Roast Profiles you have downloaded from other Roast.World users into your Stash.Scheduledview displays any past or future roasts scheduled using the Create Schedule feature of the Calendar tab.
Filtering the List View


The Columns button above and to the right of the list allows you to select which details you wish to view about each roast on the list, and the Filters button lets you apply filters to only show roasts that fit your specifications.
The Actions Menu for Advanced Functions

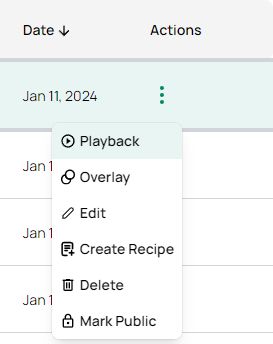
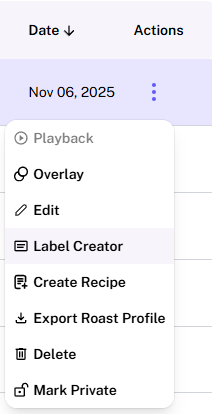
In addition to providing basic information about each roast at a glance, the list view also includes an additional Actions Menu on the far right of each stored Roast Profile. It is represented by the icon with three dots arranged vertically, as shown above.
From here you can access additional advanced features:
- Playback a Roast - This will allow you to run the selected roast again, automatically. (Please note that this function will not track the Roast Profile curve, it simply uses the same initial settings of the reference profile and also triggers changes to Drum, Power, and Fan according to the time in which they occurred within the reference profile.)
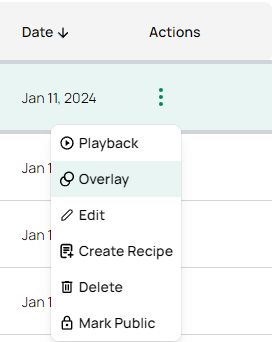
- Overlay a Roast - This will overlay the selected Roast Profile on top of an active roast to use as a reference.
- Edit a Roast - Edit details of a Roast Profile, including Bean and Milestone data.
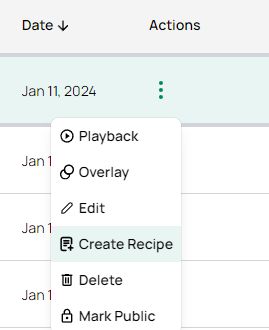
- Create a Recipe from a Roast - Automatically creates a new Roast Recipe by importing all the time and temperature based triggers from the Roast Profile.
- Delete a Roast - Exactly how it sounds.
- Mark a Roast as Private - If a Roast Profile is marked as private, you are the only one who can view it on Roast.World.
Profile View
From the Roasts tab you can also view individual Roast Profiles by clicking on their name on any of the list views. This will take you to that roast's "Profile View".
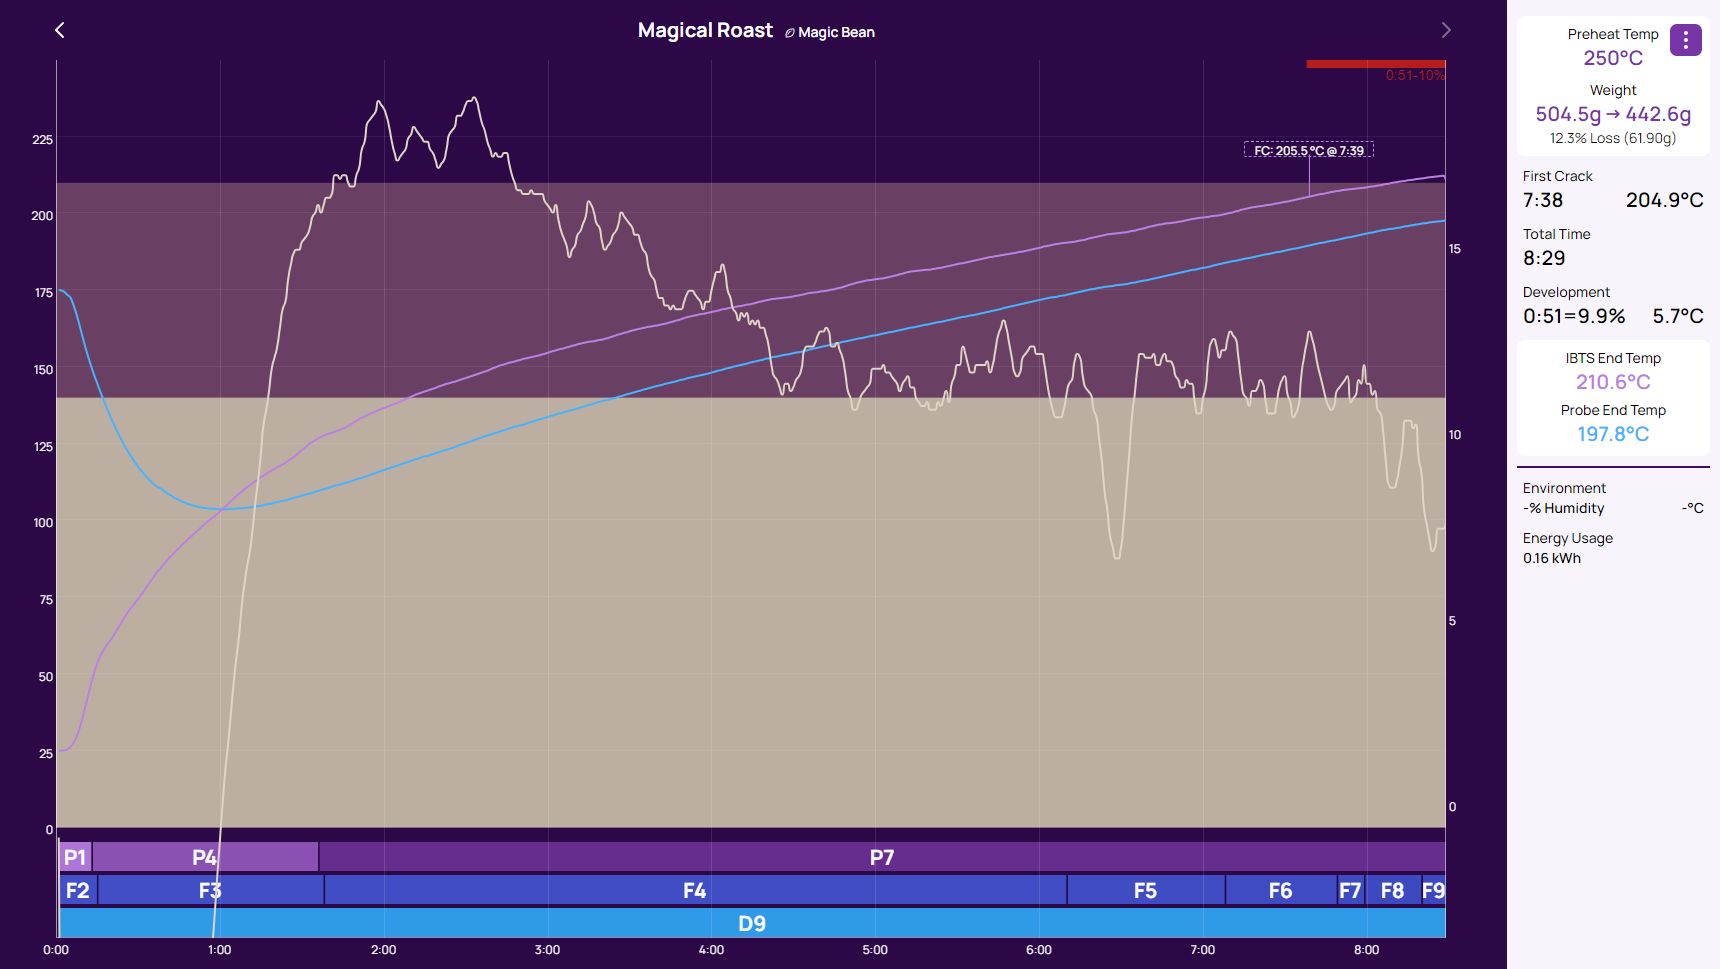
If you've seen a Roast Profile before, this should look pretty familiar. The chart here shows how the temperature of the beans, as measured by the IBTS and/or the bean probe, rose over time during the roast.
At the top is the name of the roast ("Magical Roast"), and also the RoastWorld bean associated with it (Magic Bean).
The arrows on the top of the profile view -- on either side -- allow you to quickly scroll through other roast profiles in your collection.
As you drag your mouse cursor across the chart to the left, you will see timestamped data snapshots for each and every second of the roast.
Roast Data Panel
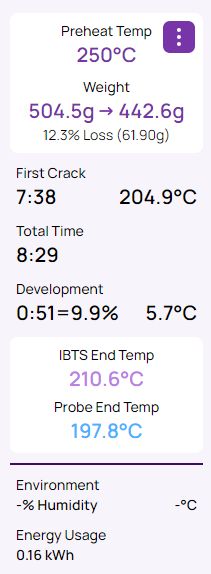
The Info Panel to the right of the chart provides more detailed data about the roast, including First Crack time, Final Bean Temperature, Total Roast Time, and Development Time and Percentage "Development time refers to the amount of time that since First Crack. The term is derived from the notion that a bean's flavor must be allowed to "develop" after First Crack.").
The Actions Menu on the top right of the panel opens up many of the same options as seen from the Actions Menu in the list views of the Roasts tab, with two additional options, Export Graph and New Graph Comment.
Export Graph - Will export a *.png image file of the current Roast Profile.
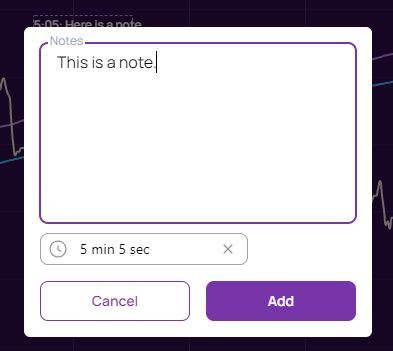
New Graph Comment - Will allow you to add customized, timestamped notes to your current profile.
Roast Action Log at the Bottom of the Roast Profile

Below the chart, you can view a timestamped history of your roast's Power (P), Fan (F) and Drum (D) settings. For example, in the above roast, you can see that the Fan speed was gradually raised from F2 all the way to F9.
Phase Bar at the top of the Roast Profile
![]()
During a roast, you can mark key milestones within the RoasTime software, including Yellowing, First Crack, End of First Crack, and Second Crack. These will be visible as timestamped events on the Roast Profile.
Marking the Yellowing and First Crack milestones will divide the Roast Profile into the three primary phases of specialty coffee roasting: Drying, Maillard (Browning), and Development. These will be visible as a Phase Bar on top of the Roast Profile.
In the example above, we can see that the Maillard phase began at 3:31, and Development at nearly five minutes afterwards. The time between each milestone is also represented as a percentage of the total time of the roast, for instance 3:31 is approximately 29% of the the 12:00 total time here.
Not every roaster will mark every milestone, but generally speaking everyone should at least mark their first crack time in order for the profile to be meaningful.
There is not really a standard definition for the different phases in coffee roasting. For instance, some roasters may divide the phase between Yellowing and First Crack into two separate phases, Maillard and Caramelization. In fact, these phases represent distinct processes that continue together well past First Crack.
Advanced Features
Playback a Roast
Playing back a roast is a form of semi-automatic roasting based on a pre-existing Roast Profile. You can access this feature via the three-dot Actions Menu from any list view of the Roasts tab.
When you Playback a roast, RoasTime will Preheat the Bullet to the same temperature as the reference Roast Profile, and once you charge the beans it will automatically follow the same time-based "script" as the original reference Roast Profile, i.e. if in the first roast, Power was dropped from 7 to 6 at the three minute mark, then the playback will also drop from P7 to P6 at the three minute mark.
Playing back a roast can produce consistent repeatable results only when roasting on the same Bullet, with the same bean, in the same ambient temperature and humidity conditions.
Overlay a Roast
If you would like to view a pre-existing Roast Profile overlayed on top of a current roast within the Active view, you can access this feature via the three-dot Actions Menu from any list view of the Roasts tab.
Overlaying a roast involves no automation, it simply gives you a visual reference of the selected Roast Profile on top of the current active roast.
Create a Recipe from a Roast
If you like the results of a particular Roast Profile and want to create a Roast Recipe from it, you can access this feature via the three-dot Actions Menu from any list view of the Roasts tab.
Selecting Create Recipe from the Actions Menu will import that roast's Preheat temperature and roast action details into "Copy from Roast Reference" panel. Here you will have several choices available for creating a Roast Recipe based off the selected Roast Profile, as shown below.
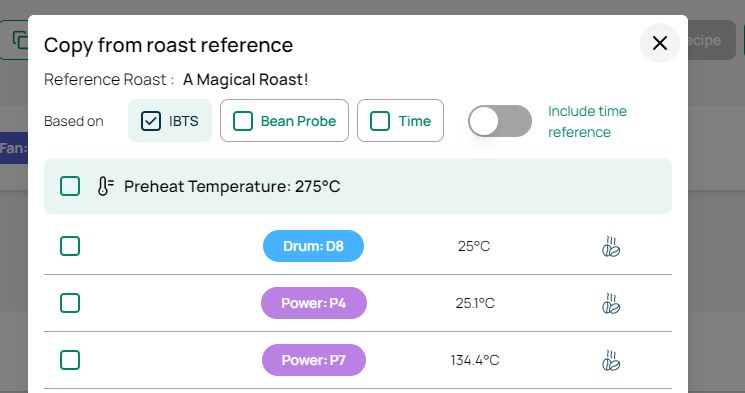
You can base your Roast Recipe on IBTS, Bean Probe, or Time triggers. Please note that basing your Roast Recipe entirely on time triggers is essentially the same as Playing Back a Roast.
Generally speaking, IBTS triggers will be the most accurate and useful.
There is also an Include time reference toggle. If it is toggled ON, then actions will only be triggered when both the time AND temperature conditions are met.
You generally do NOT want to include time references, as they can break some Roast Recipes. The only reason to do so would be if you are roasting on an older Bullet without an IBTS, relying on the bean probe for your temperature measurements. In this case, the time references will help you to ensure events don't trigger before the turning point.
For more information about Roast Recipes please visit our Recipes tab docs.
Label Creator
The Label Creator allows you to design and print custom labels for your Roast Profiles. It features a clean, minimalistic, and easy-to-use interface with two modes: View Mode and Edit Mode.
You can access this feature via the three-dot Actions Menu from any list view of the Roasts tab.
View Mode
In View Mode, you can review your labels, print them directly, or export them as PNG images. This mode pulls roast profiles and bean details from Roast.World to automatically populate the label fields.
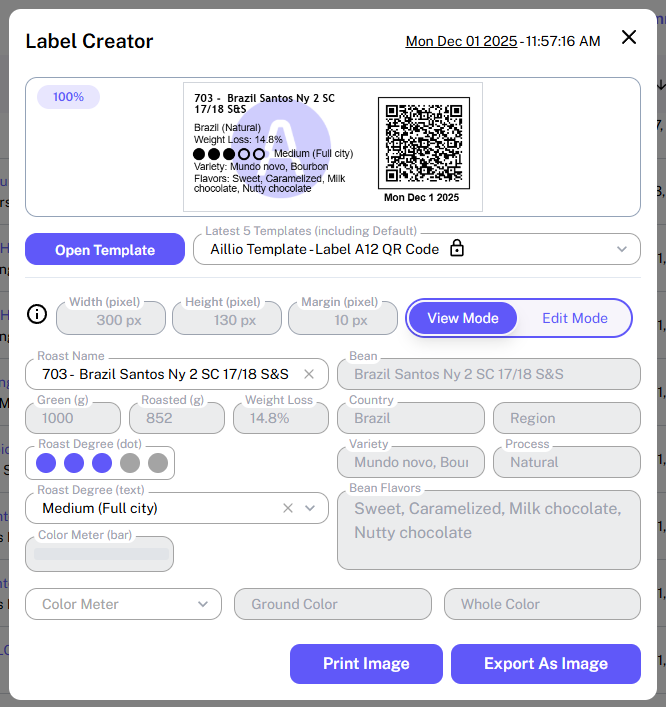
Pick label template
You can choose from default templates, open an existing JSON template, or create a new one. By default, the program loads your last-used template or defaults to Label Size A12 with QR code (79 x 34 mm / 3.11 x 1.34 inches).
 Common Die-Cut Label Examples:
- Label size A12 for laser or inkjet printer
- Brother Thermal Label DK1208
- Common Direct Thermal Label 3.25" x 1.5"
Caution
It is recommended to save your custom designs as JSON files. Cached templates may be cleared when RoasTime is updated.
Data Sources
The Label Creator uses two primary data sources to fill in your templates: Roast Profile from RoasTime and Bean Details from Roast.World, as shown below:
Roast Profile
- Roast Name
- Roast Date and Time
- Roast Green/Roasted bean weight
- Roast Degree of Roast
- Other details from roast profile
Bean details
- Bean Name
- Bean Origin
- Bean Variety
- Bean Processing
- Bean Flavors
- Other Bean details from Roast.World
An active internet connection is required to fetch bean details and QR codes from Roast.World.
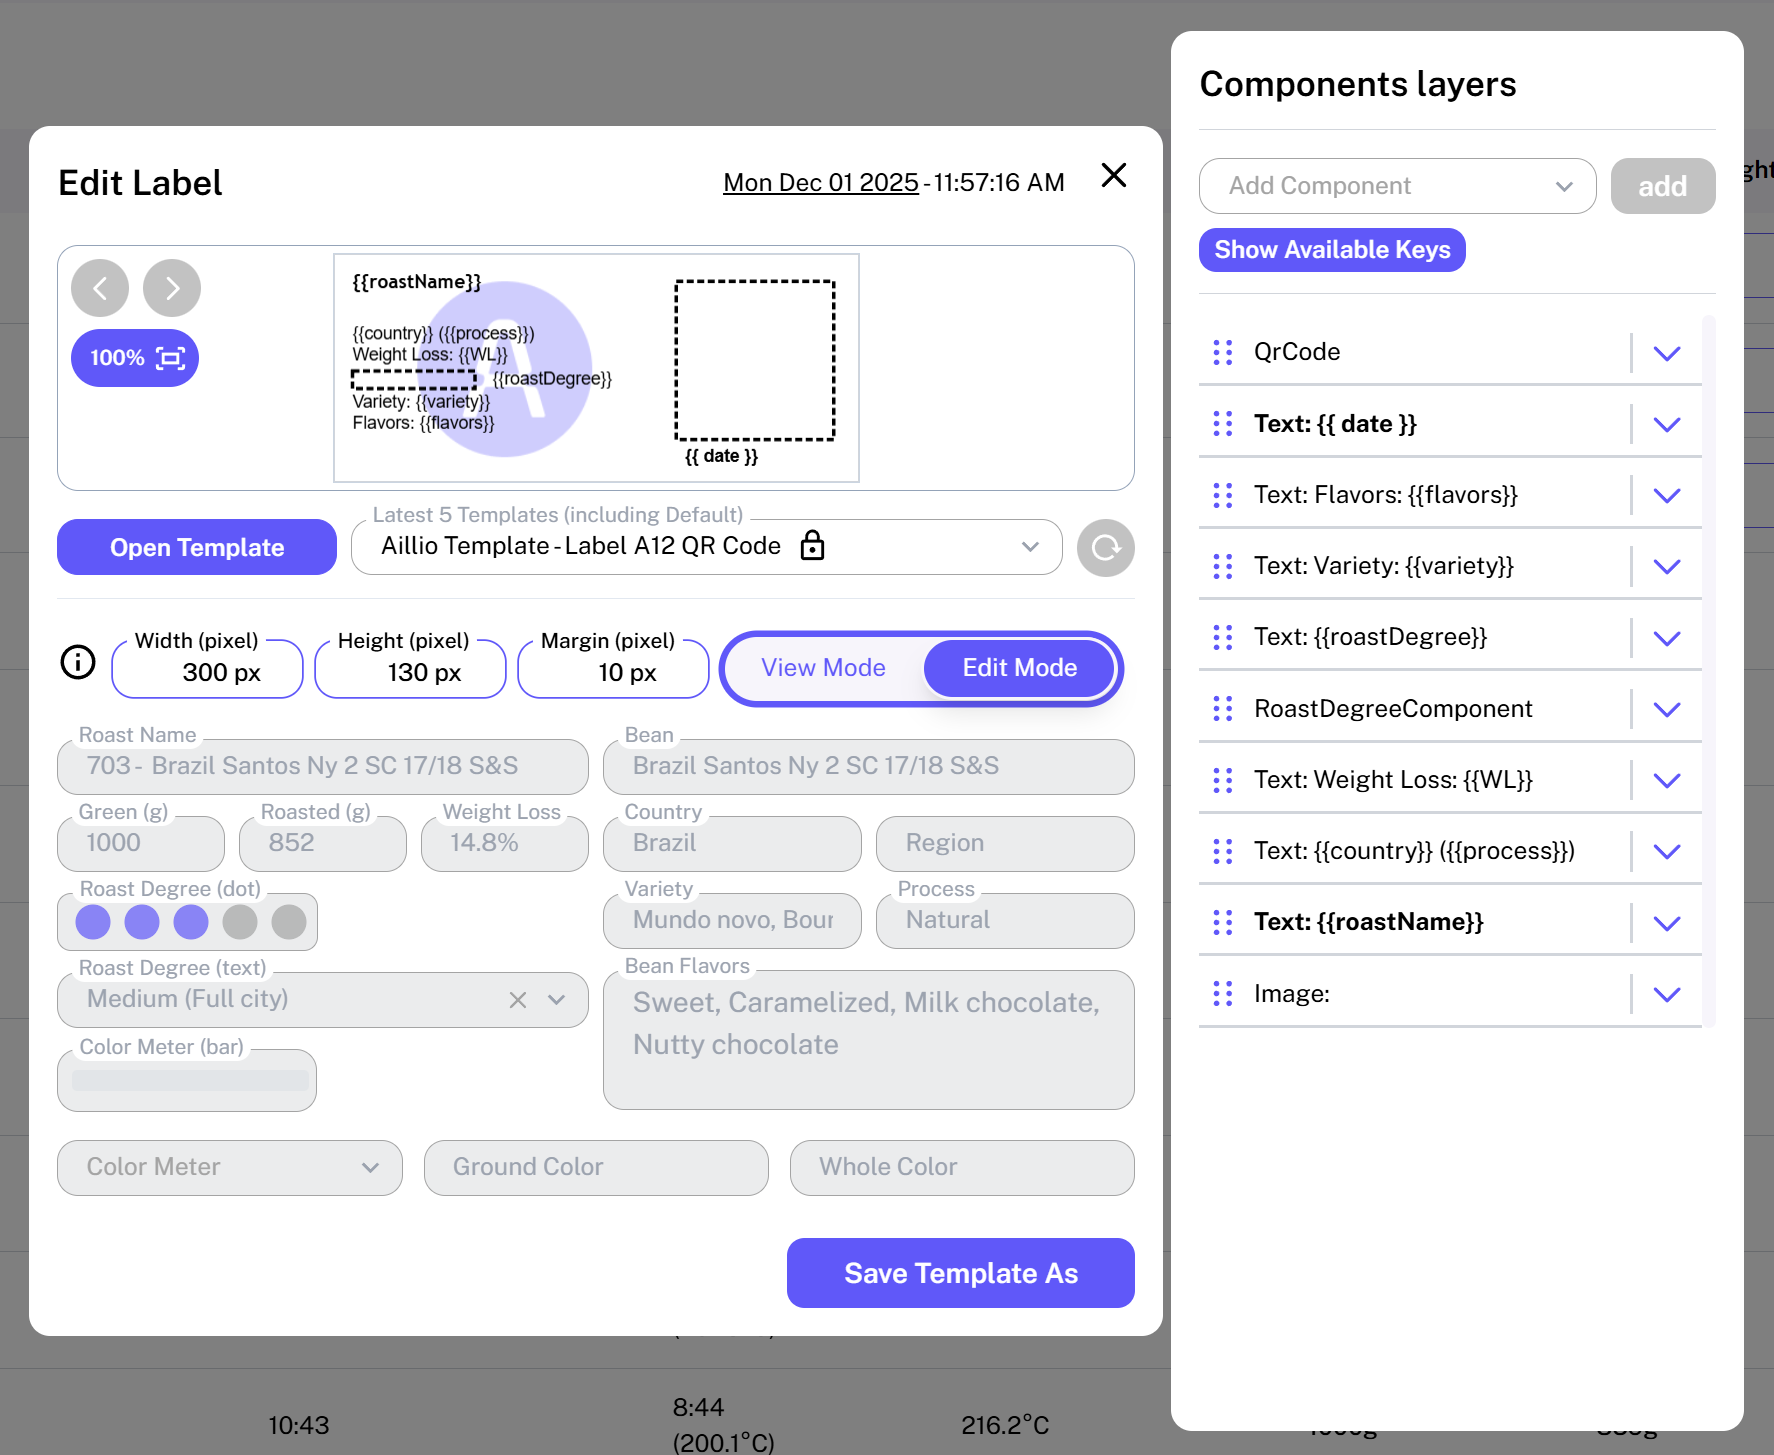
Edit Mode
In Edit Mode, you can customize label templates by adding or removing elements. You can toggle this mode using the View-Edit Mode button.
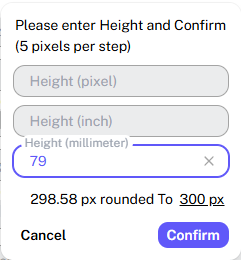
Label Size settings
Adjust the label Width, Height, and Margins by entering values into the size fields. RoasTime includes a built-in converter; once you click Confirm, it converts your physical dimensions into pixels at 288 DPI.

Change History and Zoom
Undo/Redo: Use theUndoandRedobuttons or hotkeysCtrl + ZandCtrl + Y.Reload Template: Revert the template to its original saved state.Zoom: Use the mouse wheel to zoom in and out of the canvas.Panning: Hold the middle mouse button to grab and move the label around the workspace.Fit to View: Reset the zoom to 100% and center the label.

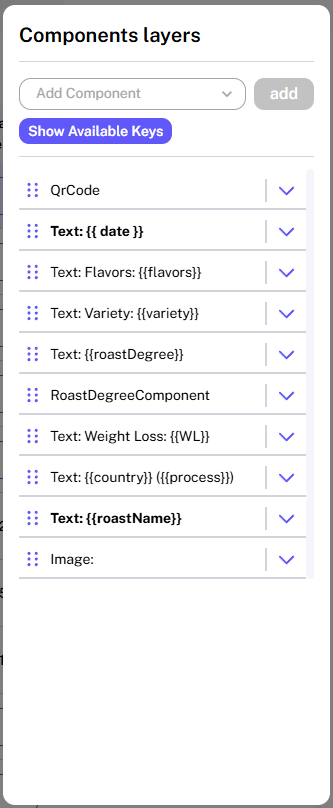
Components layers
In the Edit Mode, you can add, edit, and delete components layers with this window:
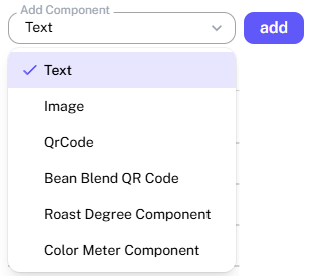
Add Components
Select a component type from the list and click Add.
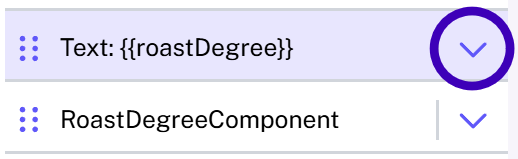
Edit and Delete Components
Edit components by clicking on the target component and clicking on the down arrow to open the Edit window. In the Edit window, you can change the component's properties, such as position, size, font, opacity, scale, and text. Delete the component by clicking the Delete button.
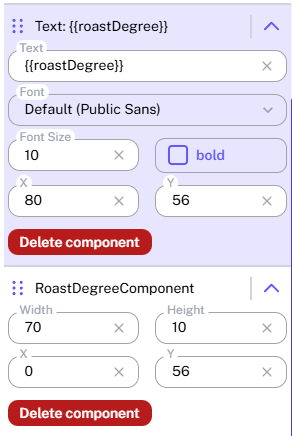
Component Position and Size
Drag components directly on the canvas or manually enter X and Y coordinates.
Change Layer Order
Reorder layers by dragging them up or down in the list. The top layer in the list is the frontmost on the label. Useful for ordering Images and Background.
Template Keys
The magic of non-repetitive work is to add template keys to the label by using the Text component. The keys will be replaced with the actual data in View mode. available keys can be found in the Show Available Keys button.
Example: {{ roastName }} will be replaced with the actual Roast Name in View
mode.
Hotkeys and Shortcuts
Ctrl + S: Save the label as a PNG (View Mode) or save the template as a JSON (Edit Mode).Ctrl + Z / Ctrl + Y: Undo / Redo.Arrow Keys: Move the selected component layer up/down/left/right.Delete: Delete the selected component.Scroll up/down: Zoom in and out of the Label on the canvas.Middle-click Hold: Hold the middle mouse button to pan across the canvas.