Seller Onboarding
Welcome, roaster! This guide walks you through setting up your shop on Buy Roasted Coffee so you can start selling your coffee. There are three steps:
- Your Shop — your public profile and the address you ship from
- Your Stripe Account — how you get paid
- Custom Domains (optional) — use your own web address
You'll need a seller account and to be signed in to your seller dashboard. If you don't have a seller account yet, login to Roast.World and select 'Shop Front' from the main dropdown to create your account. Note that only sellers in the US with a registered Bullet can signup for a seller account at this time.
Finding the onboarding steps
Once you're signed in to your dashboard, look for the Onboarding section at the top of the left-hand menu. It contains all three steps. You can work through them in any order, and come back to any step later.

While your setup is incomplete, a banner at the top of the Your Shop and Your Stripe Account pages reminds you what's left to do. Your shop goes live once you've (1) filled in your shop details, (2) added your stock-location address, and (3) connected Stripe.
Step 1 — Your Shop
Open Onboarding → Your Shop. This page is your public storefront profile, plus the address you ship from.
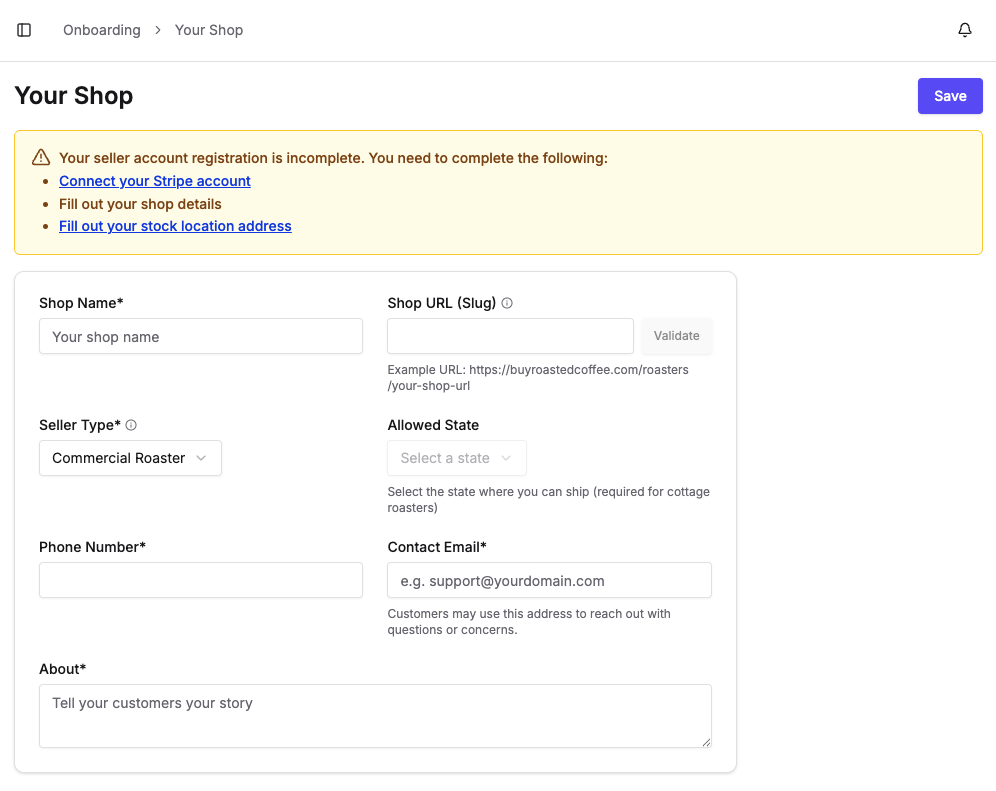
Fill in the details at the top of the page:
-
Shop Name (required) — the name customers see on your storefront.
-
Shop URL (Slug) — the last part of your web address, at
…/roasters/your-shop. Leave it blank to have one generated automatically, or type your own and click Validate to check that it's available. -
Seller Type (required) — choose how you sell:
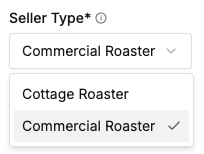
- Cottage Roaster — sell within your own state under local cottage-food rules. You'll also need to pick your Allowed State.
- Commercial Roaster — sell nationwide with a full commercial license.
-
Phone Number and Contact Email (required) — how customers can reach you with questions.
-
About (required) — tell customers your story (15–1000 characters).
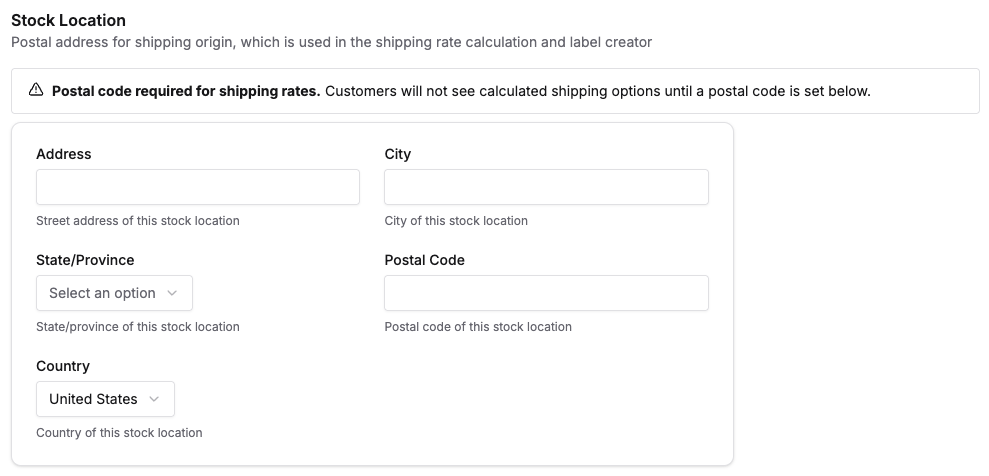
Stock Location
Scroll down to Stock Location and enter the address you ship your coffee from. This is used to calculate shipping rates and to create shipping labels.
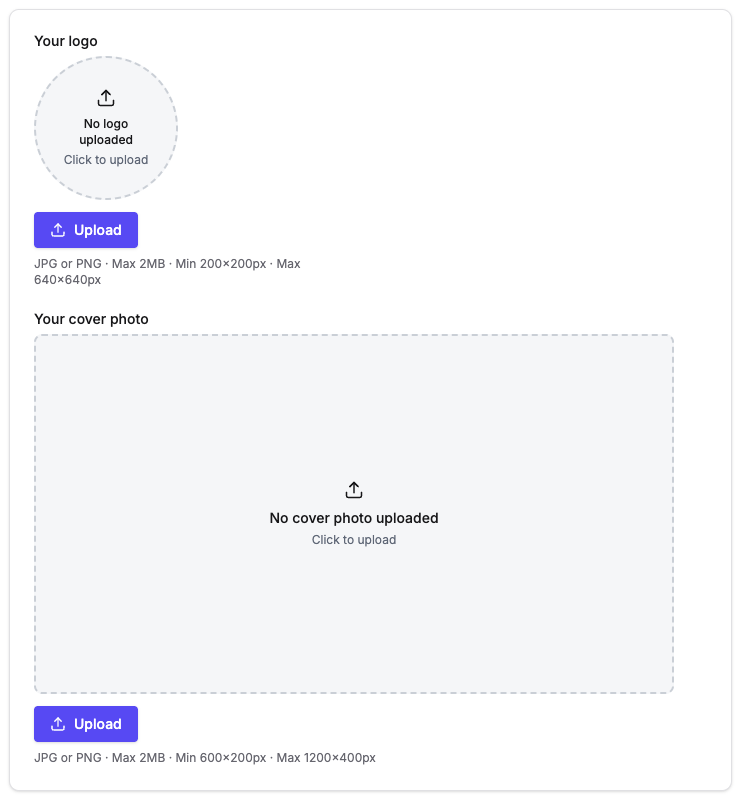
Shop images
Add Your logo (square — between 200×200 and 640×640 px) and Your cover photo (wide — between 600×200 and 1200×400 px). Both accept JPG or PNG files up to 2 MB.
When everything looks good, click Save in the top-right corner.
Step 2 — Your Stripe Account
Buy Roasted Coffee uses Stripe to handle payments and pay you securely. Open Onboarding → Your Stripe Account.
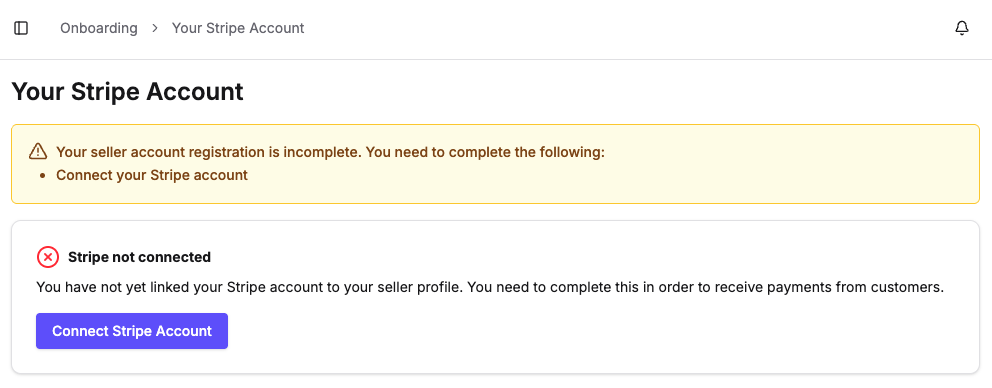
Click Connect Stripe Account to be taken to Stripe's secure onboarding, where you'll enter your business and bank details. When you finish, Stripe sends you back to your dashboard automatically.
The status card tells you where you are:
- Connect Stripe Account — you haven't linked Stripe yet (required before you can receive payments).
- Verification in progress — Stripe is reviewing your details, which usually takes 2–3 minutes.
- Complete Stripe Setup — Stripe still needs a little more information.
- Connected — you're all set. Use Open Stripe Dashboard to view your payouts.
- Reconnect Stripe Account — your connection expired or was revoked; reconnect to keep getting paid.
Step 3 — Custom Domains (optional)
Want customers to reach your shop at your own web address, like shop.yourroastery.com? Set up a custom domain. This step is optional — your shop already works at its Buy Roasted Coffee address.
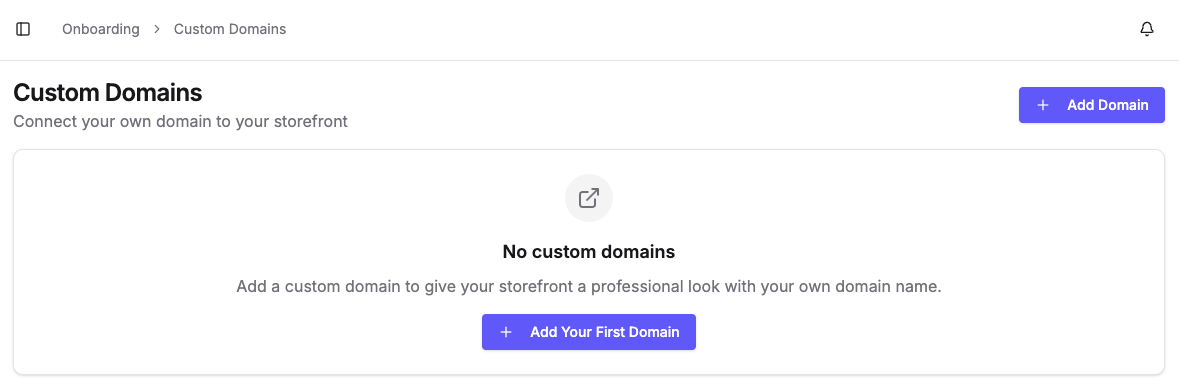
Open Onboarding → Custom Domains and click Add Domain (or Add Your First Domain if this is your first one).
Enter the domain you want to use and confirm:
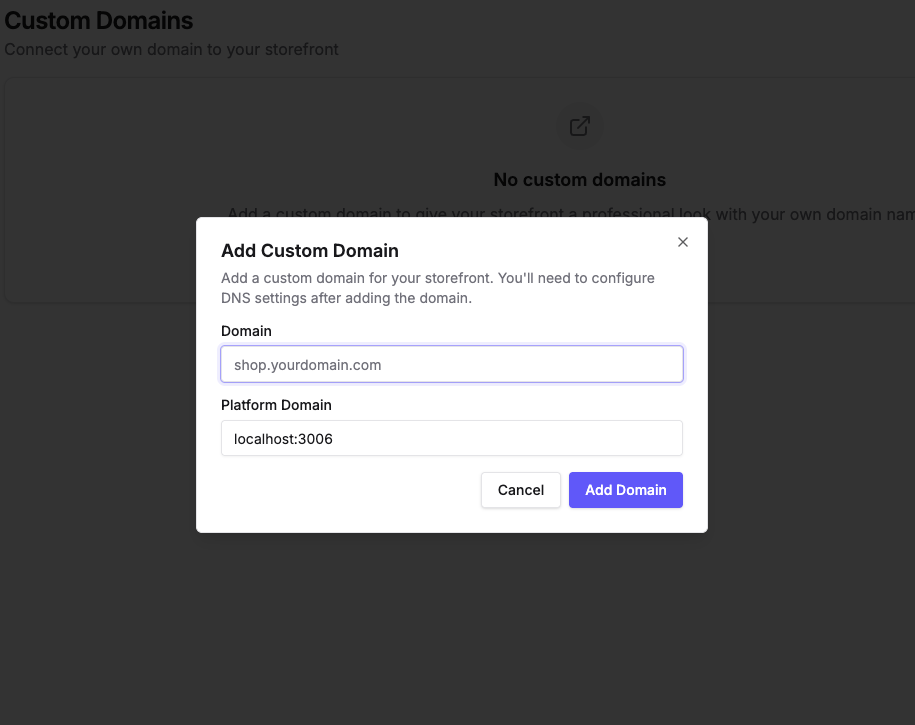
After you add it, the dashboard shows a CNAME record to create with your DNS provider (the company you bought your domain from). Add it exactly as shown:
| Field | Value |
|---|---|
| Type | CNAME |
| Name | your subdomain (for example, shop) |
| Value | the Platform Domain shown in the dialog |
| TTL | 300 (or your provider's default) |
Once the record is in place, return to the dashboard and click Verify. The status badge moves through Pending Verification → Verified → SSL Provisioning → Active.
DNS changes can take up to 24 hours to propagate. If verification doesn't succeed right away, wait a little and click Verify again.
When the badge reads Active, your storefront is live on your own domain.
You're all set
Once your shop details are complete, your stock-location address is filled in, and Stripe is connected, your shop is live and ready for orders. From here, head to Catalog to add your coffees and Shipping and Packaging to set up your shipping methods.