Pro Cooling Tray Operation Manual
⚠️ IMPORTANT SAFEGUARDS ⚠️
Please inspect the packaging for any damage after receiving the Pro Cooling Tray. Please contact the shipping company and document the damage when in doubt. Basic safety precautions should always be followed when using electrical appliances, including the following:
General Safety
- Read all instructions carefully.
- Always plug the cord into the appliance first, then into the wall outlet.
- Arrange the power cord and keep the cords away from the front part of the roaster, which may get very hot and melt the wires.
- Never touch moving parts or place hands/fingers inside the tray while the stirrer is running.
- The Pro Cooling Tray is intended only for cooling coffee beans. Cooling other materials will void the warranty.
- DO NOT disconnect the power until the cooling cycle has finished, as it may damage the electronics.
- Move the Pro Cooling Tray with full support underneath, including the Main part, Chaff Filter Box and Coffee Bag Spout.
- Always let the Pro Cooling Tray cool down completely before moving or servicing it.
- Unplug when it’s not in use and before cleaning. Allow it to cool before attaching or removing parts.
- Do not modify the Pro Cooling Tray.
- Do not use the Pro Cooling Tray if it is damaged or if you suspect a malfunction.
- Do not attempt to service the Pro Cooling Tray yourself. Using unauthorized attachments may cause hazards and void your warranty.
Revisions
| Version | Changes |
|---|---|
| 1.0 | Initial release. |
Table of Content
- IMPORTANT SAFEGUARDS
- Revisions
- Getting Started
- Operating The Pro Cooling Tray
- Maintenance
- Specifications
Getting Started
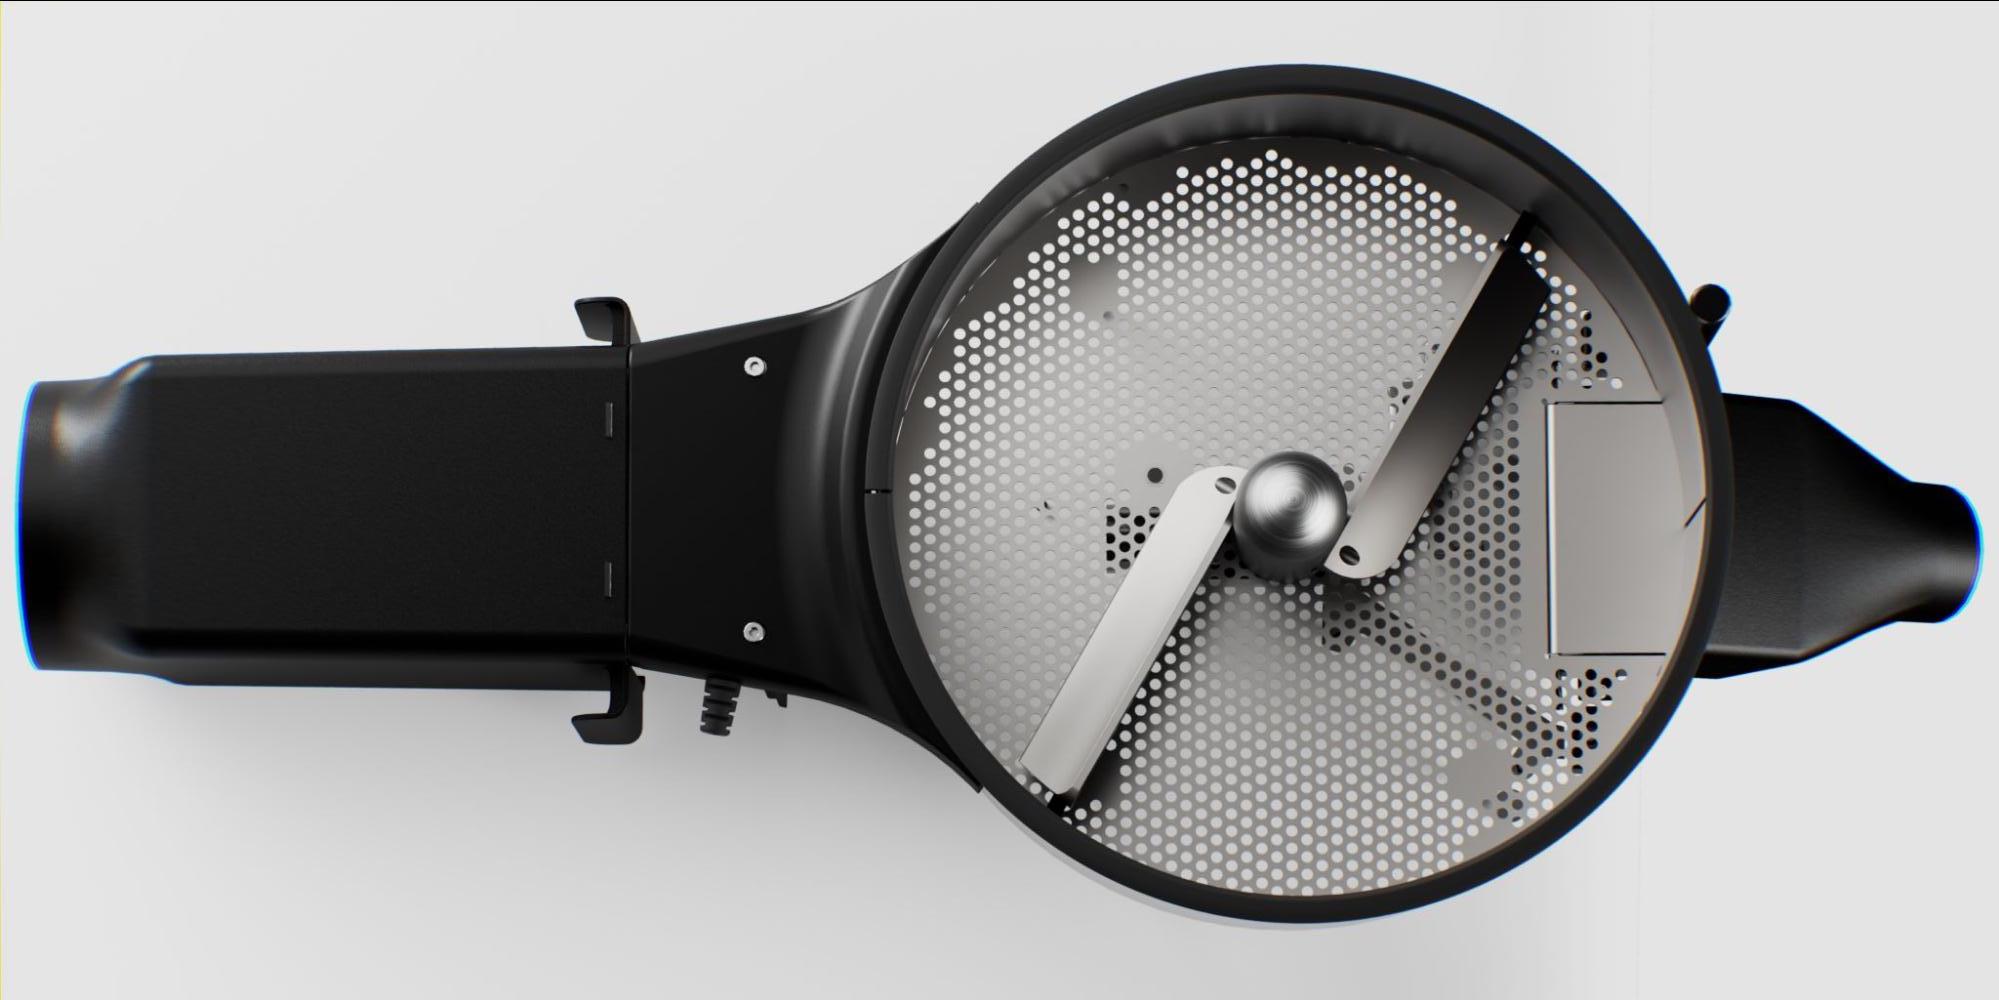
Pro Cooling Tray Overview(Connected with R2/R2 Pro)
Unpacking and Preparing the Pro Cooling Tray
The Unboxing video guide will be updated soon. Stay tuned.
Installation
- Assemble the Bean Stirrer
- Secure the blades to the axis with screws.
- Install the Pro Cooling Tray
- Place the Bean Stirrer in the center of the tray.
- Attach the Chaff Filter Box to the back.
- Snap the Coffee Bag Spout into place at the front.
- Optional: fasten the Coffee Bag Spout from the underneath with screws.
- Adjust Spacing
- Slightly push the foot apart and place the Leg Support underneath to accommodate the height of the Pro Cooling Tray.
- Proper Positioning and Placement
- Align the Coffee Bag Spout to the edge of the table (if installed).
- Reposition the R2 (Pro) so the beans can fall into the Pro Cooling Tray.
- Attach the Chaff Filter Box to the back of the Pro Cooling Tray.
- Connect the Pro Cooling Tray Cable to the R2 (Pro).
Power-On Test
- Power up the R2 (Pro).
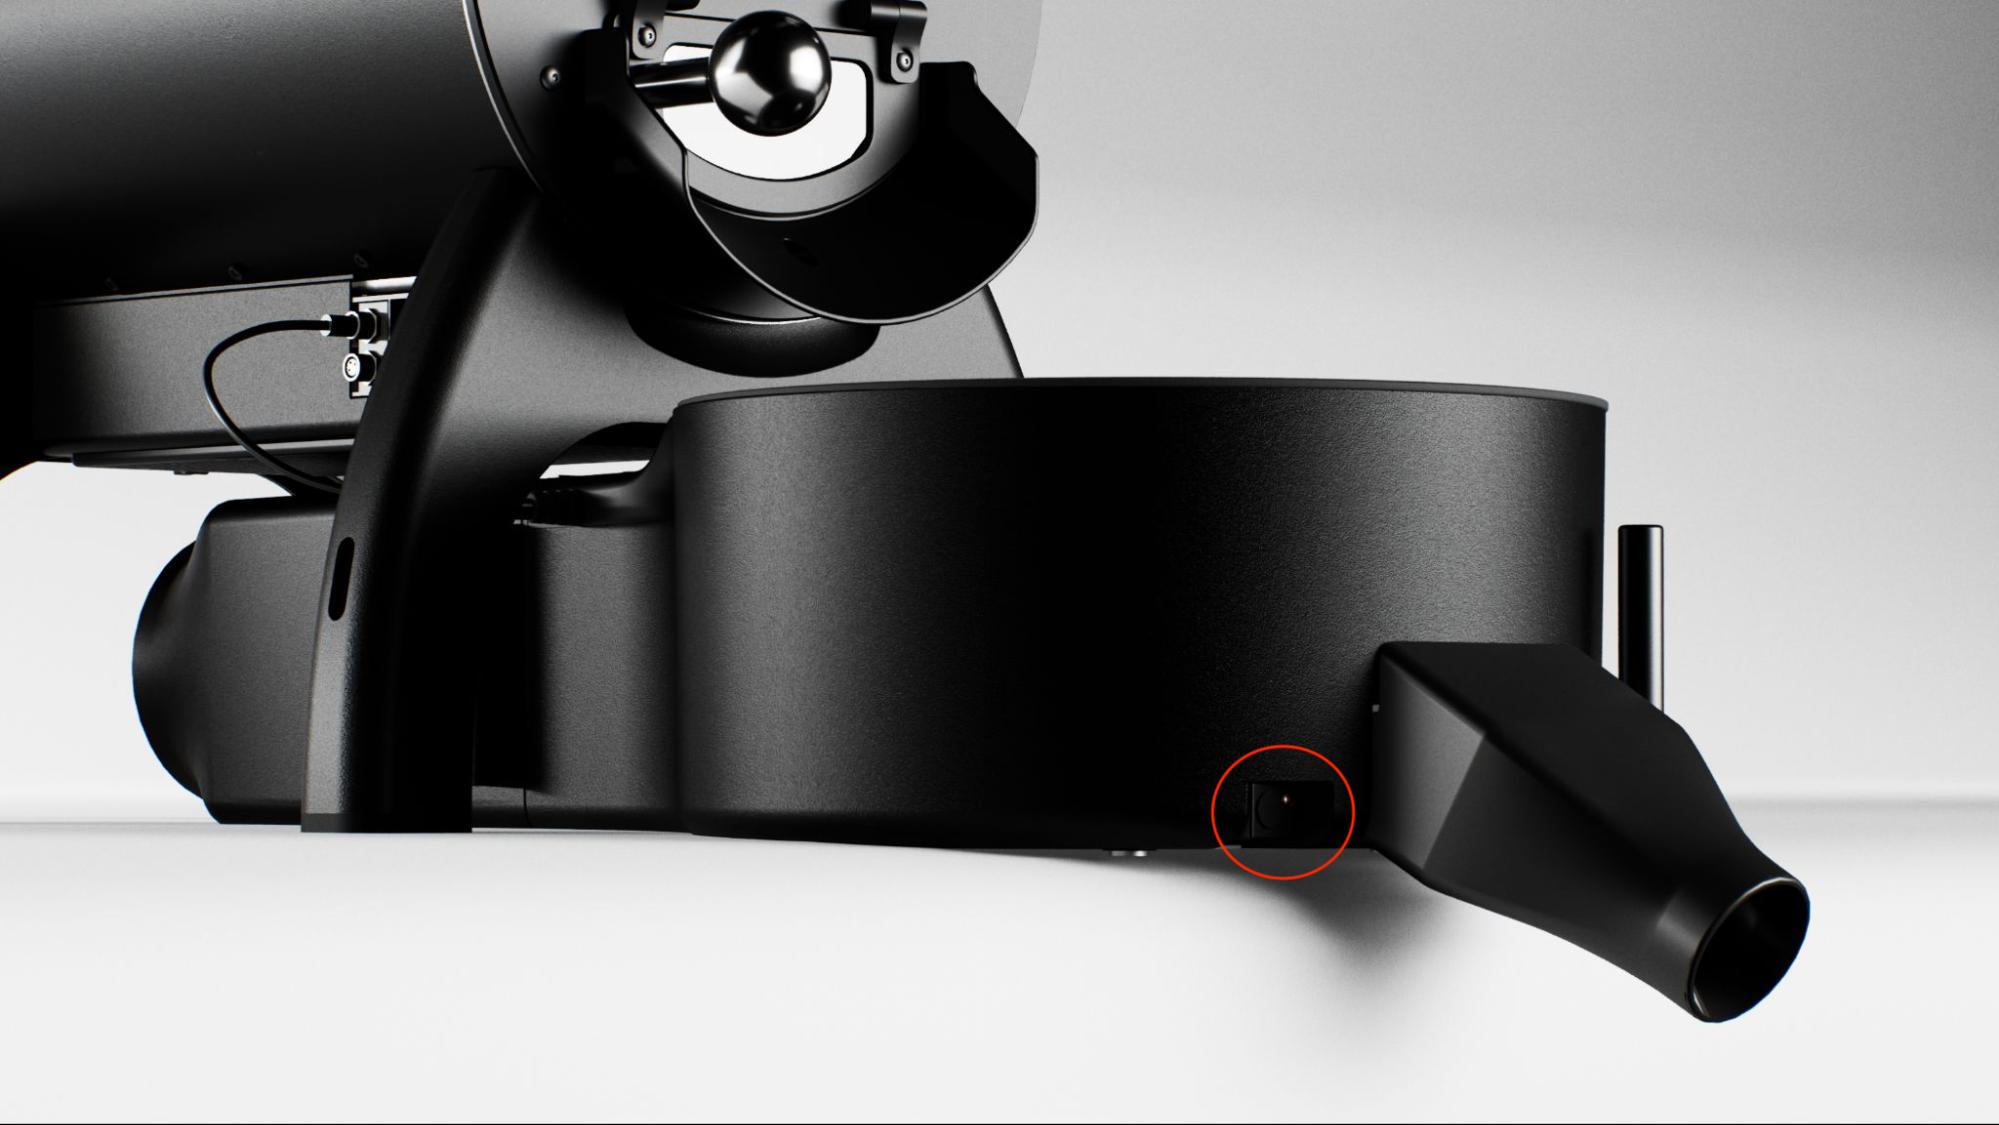
- Press the button on the left of the Coffee Bag Spout to check if the Bean Stirrer is running.
- Check the indicator light to confirm it blinks when the Bean Stirrer active.
- Long Press (press and hold for 2 seconds) the button to adjust the Cooling Fan speed.
You can cycle the Cooling Fan Speed (C) from C0 (not spinning) to C5 with each long press.
The button does not work when the R2 is controlling the Pro Cooling Tray through the Control Panel.
- The Control Panel overrides the button's settings.
Operating The Pro Cooling Tray
Cooling The Beans
The Pro Cooling Fan and Bean Stirrer will automatically activate during Cooling Mode. The Pro Cooling Fan initially runs at C5, while the Bean Stirrer runs at a constant RPM.
- Adjust the Cooling Fan Speed using the Control Panel on the R2 (Pro).
- Set the Cooling Fan Speed to C0 to stop the Bean Stirrer and Cooling Fan once the beans have cooled down.
- The cooling process takes about 2 minutes for a 1kg batch.
You can go to Back-To-Back Roast Mode to cool the beans and preheat the R2 (Pro) for the next batch simultaneously.
The Pro Cooling Tray will also stop when you switch to Shut Down Mode.
Spouting The Beans
You can manually activate the Bean Stirrer for bagging purposes.
- Press the button on the left side of the Coffee Bag Spout.
- Press the button again to stop the Bean Stirrer once you've done bagging the beans.
The Indicator Light will blink when the Bean Stirrer is active
Unplugging The Pro Cooling Tray
- Allow the Pro Cooling Tray to cool down after use.
- Always turn off the R2 before unplugging the Pro Cooling Tray from the Bullet.
- Do not unplug the Pro Cooling Tray before turning off the Bullet to avoid damage.
- Disconnect the Pro Cooling Tray from the R2 before moving it.
Moving The Pro Cooling Tray
- Unplug the Cooling Fan Cable from the R2.
- Detach the Chaff Filter Box.
- Relocate the Pro Cooling Tray to a new desired location by holding it securely from the bottom, including the Coffee Bag Spout.
Maintenance
Cleaning
Follow the cleaning instructions regularly to keep the Pro Cooling Tray in prime condition. All maintenance must be done only when the the Pro Cooling Tray has cooled down.
The Pro Cooling Tray Maintenance falls into "Regular Maintenance" category; you will need to maintain it once every 30 kg of roasts. The Pro Cooling Tray maintenance follows the same principle as Chaff Collector maintenance. Please find the maintenance details for each part:
Chaff Filter Box
- Unplug the Pro Cooling Tray Cable.
- Remove the Chaff Filter Box and dump the chaff.
- Examine the Pro Cooling Tray Filter to see if the mesh is clogged.
- Soak the Pro Cooling Tray Filter in hot water mixed with baking soda.
- Brush and poke the gunk out of the mesh with a toothbrush.
- Rinse and dry before reassembly.
Pro Cooling Tray Basket
- Unplug the Pro Cooling Tray Cable.
- Remove the Bean Stirrer.
- Vacuum any chaff from the Pro Cooling Basket.
- Wipe the pro Cooling Basket with a piece of cloth dipped in warm water if some gunk has built up inside the Pro Cooling Basket.
Basic Troubleshooting
Please contact [email protected] whenever you run into issues. The serial number can be found under the Pro Cooling Tray. The troubleshooting guides will be updated soon.
Remove the Bean Stirrer Before shipping the Pro Cooling Tray to avoid damaging the Stirrer Motor Shaft.
Specifications
Pro Cooling Tray Spec Overview
| Feature | Specification |
|---|---|
| Cooling Capacity | Maximum 1200g |
| Minimum Cooling Time | 2 minutes |
| Power Requirement | 70W |
| Current | 3A |
| Input Voltage | 24VDC |
| Max. Recommended Ambient Temperature | 10–30°C |
| Tray | Detachable |
| Stirrer | Fixed RPM |
| Spout | Manual |
| Button | Short press to de/activate the stirrer. Long press to change Cooling Fan speed; 5 stages. |
| Coffee Bag Spout | Optional. Can be fixed or detachable |
| Weight | 4 kg |
| Dimensions | L:680mm W:295mm H:138mm |
| Shipping Weight | 6.46 kg |
| Shipping Dimensions | L:658mm W:385mm H:224mm |
| Warranty | 2 years |
| Country of Origin | Taiwan (Designed in Denmark) |